Basic information about various hobby and craft topics.

Thursday, June 29, 2006

Plastic Toy Army Soldiers


Plastic toy soldiers are available in three major scales, or sizes. The largest of these is 1/18 scale, which are about four inches, or 103 millimeters high. These measurements are only approximate as different manufactures tend to do things their own way. The major manufactures in this scale are BBI, McFarland Toys, Papo and Bullyland. There are others. 1/32 scale soldiers, which are approximately 2 ¼ inches in height, or 56 millimeters. The smallest scale commonly manufactured is 1/72 scale, 25 millimeter, or approximately one inch in height. The 1/72 scale are more consistent in size between manufacturers.

Plastic toy soldiers run the gamut from action figures, toys and collectables with each manufacturer pretty much producing one type of product. Action figures tend to be larger, up to twelve inches tall and include usually include accessories like uniforms and weapons which can be interchangeable between figures. They usually have moveable arms, legs, and head. Plastic toy soldiers tend to be smaller, but still large enough for small hands to grip. These are usually in the 1/32 scale category. The smaller 1/72 scale plastic army soldiers tend to be collectables, for war games or diorama building. Some of these are unpainted.

There are many manufactures of plastic toy soldiers. A few are outlined here.
Dusty Trail - six inch, 1/12 scale action figures. This is a small but interesting line.

Airfix - manufactures and extensive line of mostly World War 2 1/72 and 1/32 scale plastic army soldiers. The line includes other historical soldiers such as Napoleonic soldiers and spacemen.

BMC - A nice line of plastic toy soldiers. It includes World War 2 plastic soldiers and accessories. There are also Civil War soldiers, Revolutionary War soldiers, an Alamo play set, and some cowboy and Indian play sets.

Armies In Plastic - Collectable 1/32 scale line of plastic toy soldiers. This interesting company has American Civil War, Napoleonic Wars, American Northwest, Spanish American War, Boxer Rebellion, and Colonial Africa plastic soldiers included in its offerings.

Plastic toy soldiers are offered in a variety of different scales and types from action figures to collectable plastic soldiers. Plastic army soldiers are fun toys for kids, used in war gaming, or for the serious historical collector who wishes accurate representation of the soldiers from other eras.

Wednesday, June 28, 2006

Short History Of The Knight - Knight Toy Figures


The knight is a romantic figure which beckons to us across the misty pages of history. Pledged to be brave, loyal, courteous, and to protect the innocent, the knight epitomized the best ideal that a man could strive to become. The knight was usually a man of noble birth who had served first as a page, or attendant in a knights household. Later the knight errant served as a squire to the knight. His duties now were to take care of the knights horse and armor.

The class of knights, or mounted warriors, came into existence to meet a specific threat. European kingdoms were under threat from a number of sources – Vikings from the north, Muslims from the south and east, and invaders from the east. The kings in the ninth century had only infantry to defend against these threats. Infantry alone was vulnerable to the mounted invaders.

So the class of knights arose. The training and maintenance of these mounted warriors
was a hardship to the courts. Feudalism arose as a process to maintain the knights. The knight, after pledging an oath of loyalty to the king, received a parcel of land, called a fief, to support him. With the land went serfs who were to serve the knight. The knight then had to answer the call when the king sent word that he needed assistance in battle. Usually this entailed a certain number of days a year that the knight had to serve the king. He rest of the time he resided at his fief.

Chivalry as a code of conduct for knights arose from this feudalistic system. This code of honor entailed a number of practices which included not attacking an unarmed knight, and ensure that the knight fight only for Christian glory and honor, among other things.

Toy knights and figurines serve to replicate the honor and glory of that past age. Many of the ads here on this page will have an assortment of toy knights to suit your purposes. William Britains, Conte Collectables, and Forward March all offer selections of 1/32 scale toy knight figures.

Tuesday, June 27, 2006

A Brief History Of The Castle


The romantic vision of the knight is often accompanied by the image of a castle, high on a hill. The history of the castle is imbedded in our culture. The word castle is derived from the Latin word castellum, or small fortified place.

The cities of Rome were walled to provide for their defense and this is the origin of the first castles. These were usually constructed of wood, on top of a mound, or motte. A ditch was usually dug around the structure to make approach more difficult.

As the art of warfare developed, the castle needed to be made more complex to make it harder to capture. Multiple walls were constructed, one inside another, the area between the walls being called a bailey.

The history of the castle continues with its still further development of large towering structure in the center of the castle called the keep by the Normans. This was the last defensive position within the castle and featured thick masonry walls and small defensive window to allow archers and other defensive measures. The keep would also contain living quarters for the castle dwellers, a well for water, and stores of food and weapons.

Keeps were first constructed as rectangular structures, later they were made round because
that shape is easier to defend.

At about this time the moat replaced the ditch as the outside defense of the castle. The moat was wider and deeper, and preferably filled with water. It was crossed by a drawbridge which could be raised and lowered at will.

By the 1200’s the final evolution of the history of the castle occurred as they became increasingly complex. The keep was made smaller and stronger. The apartments were moved out of the keep and into larger structures located in the bailey.

The early sixteenth century saw the invention of gunpowder and the development of cannon, missiles, and guns. The history of the castle as a military tool came to an end, as they were no longer impregnable to these modern weapons.

Back to Toy Soldier

© 2012 Hobby Hobnob

Monday, June 26, 2006

Toy Soldiers - Military - Army Toys - Model Soldiers


Most adult men had toy soldiers as young boys. We didn’t have just a few, either. I had enough to fight several wars at one time. Army and military toys are still popular with children. With adults, too, with the advent of vast selections of collectable toy soldiers and military toys.

Toy soldiers are manufactured from a variety of materials. You will find plastic, wood,tin, metal, and resin. Some are prepainted, some require painting and some minor assembly.

There are collectable toy soldiers, soldiers for war games, and soldiers for kids.

There are many different types of soldiers. You will find soldiers in the character of American Civil War, American Revolutionary War, World War 2, Alamo, and Cowboys and Indians. Other model soldiers from other armies can also be found.


You will find two basic sizes of toy and model soldiers - 1/72 and 1/32 scales. 1/72 scale is 25 millimeter and 1/32 is 54 mm tall. From model train manufacturers you will also find some 1/87 (HO Scale) toy soldiers.

Army and military toys are also popular. These consist mostly of plastic and diecast
military airplanes and vehicles. These are available in several scales including 1/87, 1/64,
1/48, and 1/24 among others.

You will find in this section various articles about toy and model soldiers, army and military toys. You will also find links to companies selling these products. Hopefully the information provided by these articles help you choose the products which suit your needs

Toy Soldier Catalog

Toy Metal Soldiers

A Brief History Of Castle

Back To Hobby List

Short History Of The Knight – Knight Toy Figures

American Revolution Soldier

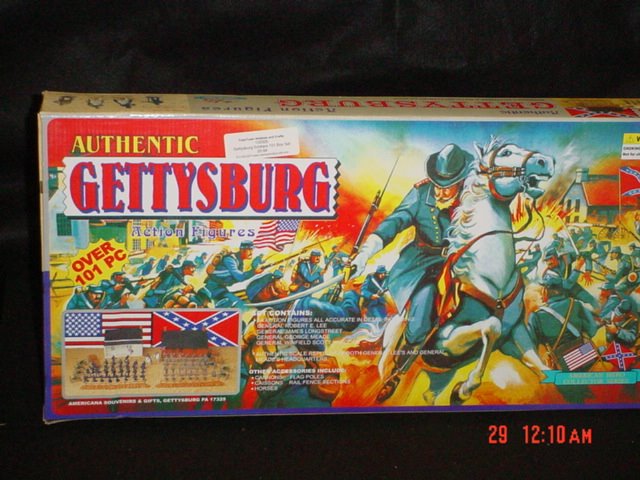
American Civil War Toy Soldier - Metal And Plastic

© 2012 Hobby Hobnob

Friday, June 23, 2006

Build A Bird Feeder Kit


Building a wood bird feeder from a kit is easy and a great project for kids. The kits can
be assembled in one session, another can be used to paint and decorate. Bird feeders and houses
may be painted on the outside, but should be left unfinished on the inside.

A short pictorial guide is located at this URL:
http://www.thc-toys-hobbies-crafts.com/woodcrafts/buildwoodbirdfeeder.html

For available bird house and bird feeder kits as well as other wood crafts, visit our Ebay store:

To Check Availability and Purchase Products Featured Here
Visit Our Online Store

Thursday, June 22, 2006

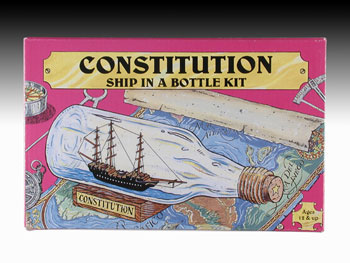
Ship In A Bottle


The art of model ship building dates back many centuries. The Egyptians, Phoenicians and Greeks all
built model ships of varying sizes and shapes. Glass bottles have also been around for a long
time. Archeology indicates the Phoenicians had glass bottles, so they have also been around for
thousands of years, also.


It wasn’t until the mid-1850’s that glass technology advanced enough to give a reasonably clear,
bubble free bottle suitable for model building. Sailors at sea whiled away the long hours carving
and making many things and a high degree of skill was developed by many of these mariners. No one
knows who first put a model ship in a bottle, but it occurred sometime during the mid 19th century.

The sailors used available materials, scraps of wood, thread and sail. The common tool was the
jackknife most sailors carried. Usually the mariners modeled the ship they were on, or other ships
they were familiar with. These were built outside the bottle, carefully measured to ensure the
completed model would fit through the neck. The masts were folded down and rigged so that they
could be pulled up after the model was inserted into the bottle.

The ship in a bottle is a type of mechanical puzzle called an impossible bottle. It is called this
because items thought be impossible to fit inside a bottle are placed there, leaving the observer to
wonder how it came to be. Many types of items can be found in this traditional puzzle, including
decks of cards, tennis balls, scissors, and of course the ship in a bottle.

Thursday, June 15, 2006

Wood Bird House Kits Make Ideal Cub Scout Crafts - Youth Group Activity


Wood crafts are an ideal activity for youth groups and as cub scout crafts.
These wooden bird house kits are easy to assemble
and include all parts necessary to build them. All you need are paints, nails and glue. Some of the
kits have the nails included in them.

Youth group activity leaders of Church groups, Cub scout troops, and other childrens
organizations are always looking for inexpensive crafts for the kids to do as activities, and these
wood crafts are ideal as children's group activities. Wood
crafts teach kids valuable lessons in organizing, reading and understanding instructions, and the
satisfaction one gets from a job well done. And these wood crafts are useful when finished.

Wooden bird bird house kits are
great crafts for kids! Create a backyard nature center.


We have a very good selection of wooden bird house kits. See our
Online store
for availble models and quantities.

These kid crafts kits make an excellent activity for cub scout troops!
Wood craft kits are fun and easy to assemble and these bird house kits are sure to please both kids and the
our little feathered friends when they are built.

Wood projects also make ideal activities for summer camps. They are quick to assemble as all parts
are pre cut.

Wednesday, May 24, 2006

HO Scale Train Track

HO Scale Train Track


>Bachman EZ Track has revolutionized the model train hobby with its ease of use and durable construction. This model train track is built right into a plastic base eliminating the need to staple or glue cork or foam roadbed down before you can enjoy running your model train. With EZ Track you simply snap the track sections together, plug the transformer wire into the terminal section, put the train on the track and move the controller arm. HO scale train track was never so easy to use!

HO scale train track has evolved over the years. The early years of model railroading, hobbyists had to lay track similar to the method used in real trains. The ties had to be cut from basswood stock, a laborious process. The ties were glued to cork roadbed after the rail route was laid out. The stainless steel rails were then configured to the roadbed and carefully nailed in place. A track gauge was used to ensure that the rails were the correct distance apart. Track laying using this method was as much an art as a hobby.

The advent of Snap Track made the track laying process much easier and faster. Atlas is now the leading manufacturer of this type of HO scale train track. The track is pre-mounted on plastic ties in standard length. Straight track is available in a standard of 10 inch lengths, as well as an assortment of shorter sections. Flex track, which is ideal for either custom radius curves or long runs of straight, connection free track sections. Curves are available in fifteen, eighteen, or twenty two inch radius. Partial sections of 1/3 and ½ are also available. Different types of switches are also available for this track. Code refers to the height of the rails. Code 100 is the most common type available. Code 83 is scaled to accurately represent the rails on a real railroad. Model train track took a big step forward with pre-mounted track. This HO scale track was pioneered by Bachman, under the name of EZ Track. This track was already mounted on the roadbed which made it easy to have a model railroad up and running quickly. EZ Track comes in two different types, steel and nickel silver, as well as an array of different types of sections. There are eighteen and twenty two inch curves, different lengths of straight and crossings.

Atlas and Lifelike also manufacture similar products to EZ Track and Lifelike has an adaptor which allows EZ Track to be used with its Lock-Tite product. Atlas HO scale train track sections can be removed from the roadbed and used in a conventional layout.

Atlas HO Scale Snap Track

HO Scale Nickel Silver E-Z Model Train Track

Back To HO Scale Electric Model Toy Trains

© 2013 Hobby Hobnob

Monday, May 22, 2006

HO Scale Model Electric Trains


HO scale is the most popular size of electric model train available to hobbyists. And for
good reason. At 1/87 scale it is small enough to pack a lot of detail into a small amount of
space. A four by eight foot sheet of plywood can contain a lot of different scenes for the
train to roll through.
This popularity has produced an amazing amount of track, figures, buildings and other
accessories to be produced for the HO scale train. Indeed, there are more accessories for HO
electric model trains than there is for all the other scales combined.

Add to this the sheer fun of layout building and then watching as the little electric model
toy train rolls along through towns, farms, forests and parks that you, the builder, have
created. In HO your imagination is the only limit when it comes to modeling a train
layout.


To visit our hobby informational web site

Toys Hobbies Crafts.com


To visit our online store at Ebay


Toy Train Central


You can model any era in time and just about any type of terrain in HO scale. The electric
model train can be a logging operation, industrial spur, passenger line, coal train, grain
transporter, or any one of the hundreds of uses the modern train has come to be employed at.
HO electric model trains are versitle and fun.
You can relive the early days of railroading with the historical train sets from Bachman or
build a circus with a circus train from IHC.
The articles of this website will endeavor to supply you with the information you need to
properly choose the train which suits your needs. You will find links to various retailer
who are selling the HO scale electric model train products you desire. Happy
railroading!

Friday, May 19, 2006

Rock Molds


Why make plaster rocks from molds when you could use real rocks instead? One reason is the
weight of the real thing. For a diorama or train layout you may need a lot of rocks to form
a cliff face. The weight of real rocks may be more than the base of the layout or
diorama may bear. Another reason is uniformity and ease of working with the plaster rocks.
The plaster rocks may be glued to the terrain base with a white craft glue, filled
in between easily with more hydrocal plaster and then the finished rock face may be
painted as desired with acrylic paints or pigments.
Plaster rocks are easy to make using latex rock molds. Rock faces add realism to
any train layout or diorama. Latex rock molds are flexible and reusable.They are also durable
and easy to work with.
The first step in making rocks is to mix the hydrocal plaster according to the manufacturer's
instructions. Then lighly mist the inside of the rock mold with water.
Pour the hydrocal into the mold, tapping gently when full to dislodge any air bubbles
which may have formed.


To visit our hobby informational web site

Toys Hobbies Crafts.com

To visit our online store at Amazon.com


Toy Train Central


Allow to dry for at least thirty minutes.
For variety in the rocks, you may deliberately distort the mold before pouing the plaster
by bending and twisting the rock mold. Hold the mold in place with sand or wadded up
wetted newspapers while the plaster is drying.
Do not remove the rocks from the mold too soon, as this may cause flaking of the plaster
After the hydrocal plaster is dry, you may remove the rock casting by turning the mold over
and gently twisting the mold.

Wednesday, May 17, 2006

Model Trees For Architectural And Diorama Projects


Model trees are an excellent way to add realism to any train layout or architectural
project
. You will find a large variety of model trees from which to choose. Just about
any kind of tree is available in many sizes. Trees don't necessarily need to be scaled properly
because in nature trees of all sizes are found.

Some model trees are ready made. They are usually self standing, but the base is usually
removable to make the tree more realistic. Merely remove the base and stick the pointed
end into the terrain base. No painting or glueing is required for these trees, although a few
drops of craft glue in the hole at the base will help hold the tree in place.


To visit our hobby informational web site


Toys Hobbies Crafts.com

To visit our online store at Amazon.com


Toy Train Central


You will also find model tree kits. These are usually more realistic than the ready to use
ones and are much more economical if your layout or architechural project requires a lot
of trees. Usually the kit consists of flocking, special glue and armature. The flocking is
spread out on wax paper, the glue is brushed onto the armature and the armature is then
dipped in the flocking. Trees are easily and quickly made using this process.

Model trees are perfect for parks, forested areas, lawns and office models with
landscaped areas around it. Landscape Your City, Suburb, or Country Scene With
Realistic architectural model trees

Monday, May 15, 2006

Making A Rock Mold With Liquid Latex


Making a mold with latex rubber is an easy process. If you have rocks or other objects you
would like to duplicate you can do it with liquid latex rubber. You can even duplicate rocks
in the field if there is sufficient time to allow the latex to dry.
To make a mold you brush the latex over the item to be duplicated using a synthetic fiber
brush. Make sure you work the latex rubber well into the surface to be duplicated and work out
all the air bubbles. Allow to dry thirty minutes.


To visit our hobby informational web site


Toys Hobbies Crafts.com


To visit our online store at Amazon.com


Toy Train Central


After drying, apply two or three more layers in the same manner as the first. After the last
layer is dry, the mold may be peeled off and is now ready to use.
If you want a mold with a little more strength, add a layer of cheesecloth to the mold after
the second layer is applied. Press the cheesecloth into the latex rubber before it has dried
completely and apply at least four more layers over the cloth.
You may use hydrocal to pour in the completed mold.

Friday, May 12, 2006

Lightweight Hydrocal For Dioramas and Train Scenery


Hydrocal has many uses in diorama building and in train layouts.
Use lightweight hydrocal to build terrain for model scenery for school projects, train layouts,
and other scenery applications. Lightweight hydrocal is easily mixed with water to form a
tough plaster shell or to pour into latex molds.
FEATURES:
Specially formulated for terrain model builders.
Half the weight of Hydrocal and it goes twice as far.
It's the tough, quick setting product you will prefer!
Use hydrocal for casting rocks, creating hard shell scenery, filling in
around castings and as an adhesive.


To visit our hobby informational web site

Toys Hobbies Crafts.com


To visit our online store at Amazon.com


Toy Train Central


Hydrocal may also be carved with a hobby knife or dental pick when it dries.

Leaves a smooth finish.<
May be used on Plaster Cloth for making strong hard surfaces.

May be tinted with Woodland Scenics Earth Colors (liquid pigments) or acrylic paints. Hydrocal
is a porous material which accepts color by absorbing it into its pores. Do not use
a sealer of any kind on hydrocal before painting, as that will prevent the plaster
from soaking up the paint.
Instructions are listed on the side of the package.

Thursday, May 11, 2006

Styrofoam Sheets For Diorama and Train Scenery Projects


Styrofoam sheets are used for many craft and hobby projects. Popular hobby projects include uses for train scenery and diorama projects. Foam board is mainly used in railroad layouts as a terrain base for the elements for the layout. Use over the plywood or Homesote base, or substitute.

You may use foam sheets in railroad layouts instead of heavy plywood, but you will want to build a wooden framework first. The framework can be made from lightweight furring strips or similar material, with slats placed at the bottom of the frame to support the Styrofoam sheets. Glue the foam board to the slats for strength using a compatible Styrofoam or craft glue.

Styrofoam boards are easy to cut, carve, or drill. And since there is a variety of different thick nesses to choose from there is sure to be one perfect for your project. The foam sheets may be cut with a utility knife, or a hotwire Styrofoam cutter. The foam can also be textured with craft paints, shaped with pencils, or carving tools. Use toothpicks or floral picks to hold pieces together while gluing.


To visit our hobby informational web site


Toys Hobbies Crafts.com

To visit our online store at Amazon.com


Toy Train Central


The craft foam sheets can also be used to simulate rock layers on a train layout or diorama project. Glue multiple layers of the Styrofoam sheets together, carve and shape them to simulate rock layers. Foam boards may be textured using acrylic spackling, Gesso, hydrocal plaster, or modeling paste.

Styrofoam sheets can be used for diorama bases. If two or more need to be glued together to make a larger surface, stick tooth picks, craft sticks, or similar product into one of the two edges which need to be glued. Apply a liberal amount of Styrofoam or white craft glue and press together. Use wax paper underneath. When the glue dries, you should have a nice strong bond between the two foam boards

Styrofoam sheets are ideal for use in model train scenery as they are lightweight and
easy to carve.

Thursday, May 04, 2006

How To Make A Diorama


Most of us at one time or another have studied realistic dioramas, relief maps, or other
scene representations in museums, nature centers, zoos, and other public exhibits.
Scenery making techniques are also used in many hobbies enjoyed by countless millions of
people. Model railroading, model building, dollhouse building, and school projects are
just a few of the activities which can be enhanced with terrain modeling. This series
of articles will teach you how to make a diorama


A diorama is a scene reproduced in miniature used to tell a story or create an
impression, and many people enjoy building small scenes for display. A diorama can represent
a historical, scientific, fantasy, or just about any scene the hobbyist desires.
Dioramas are used extensively by museum and other institutions to interpret concepts to
their patrons. Nature scenes, geologic representations and many other concepts are
communicated to visitors by the use of dioramas.


Model railroading also uses scenery to make the railroad appear more realistic.
Mountains, lakes, roads, cities, and forests can all be modeled in a railroad layout.
Think of a railroad as a series of dioramas.


Model builders can also use scenery to enhance the display of their models. A model car
can be displayed in a driveway, garage, or racetrack setting. Military models can be
displayed in a battle scene. A scene can be created for any model you can build.


Doll houses can also have their display improved by the use of scenery techniques. Lawn
and patio additions can be made to dramatically increase the charm and realism of a doll
house.


Many school projects can be improved by simple scenery building techniques. Working
volcanoes, history and social studies models, science projects can all benefit from
scenery building materials.


Slot car race tracks can also be enriched with scenery. You can build a model
representation of your favorite racetrack, be it Indy, Daytona, or Talladega.


Scenery building materials and techniques have been refined over the years and easy to
use products have been developed to greatly simplify the process from the old chicken
wire and paper mache days. The new materials are faster, cleaner, easier, and produce
a much better end result than the old methods.


Making a diorama is simple and the materials are easily procured. Styrofoam, duct
tape, newspaper, hydrocal, plaster cloth, ground foam, and lichen moss are the basic
ingredients. Acrylic paints and rock molds can also be used.


Styrofoam or plywood can be used as a base for the scene. Newspaper is wadded up and
used for hills. Duct or masking tape secure the newspaper to the base and help form the
terrain. Plaster cloth is stretched and formed over the newspaper/foam base.
Hydrocal - a specially formulated plaster made for modeling - can be poured into rock
molds. When dry, the rocks are glued to the hills to form realistic strata and boulders.
You can make your own molds using liquid latex rubber, or use ready made molds.
Acrylic paints are used to color the rock and dirt. Ground foam in different colors and
textures simulate grassy areas. Ready made trees or tree kits can make up forests in
the scene. Add buildings, models, and figures and Voile! You have created a
masterpiece.


Scenery kits are also available. These contain everything needed for the scene. The
Scenery Kit by Woodland Scenics is the perfect 'how to' kit. It's designed to help the
beginner get started, or assist experts refine their skills.


A diorama can be any size. A mini scene for display on a shelf can be no more than
four inches in diameter and covered by an acrylic dome. A larger scene can be
constructed on a table. Most dioramas are twelve inches by eighteen inches or so.
Size depends on the hobbyists taste, space available, and subject matter of the diorama.


The diorama can model anything the hobbyist desires. It can utilize military models for
a battle scene. Animal figures could be displayed in a realistic setting. A treasured
scene from childhood could be constructed to preserve a cherished memory. Car models
could be shown on a racetrack or pit area.


A model railroad could be thought of as a series of dioramas. The train rolls through
a series of scenes ranging from city streets, industrial areas, and farmland.


Enchanting scenes can be constructed utilizing
model castles and fantasy figures.


A slot car track could be constructed utilizing the Brickyard at Indy as a
model.


For model railroading supplies visit our
model train website located at

Toy Train Central


Friday, April 28, 2006

Rubber Band Powered Airplanes

Rubber band powered balsa wood airplanes are a kid's favorite toy! Simple to build and fun to fly, the rubber band motors require no batteries or fuel. Just wind up the rubber band and give the toy airplane a toss and it rides the wind.

Rubber band powered balsa wood airplanes are great teaching tools, too. Simple to construct, the planes can be used to teach the basic parts of an airplane as the students put it together. The rubber band powered prop can be used to give a simple demonstration of thrust and how it affects the airplane. Organize competitions to see who can fly the fastest or most distance. Encourage simple modifications to the plane to see if flight is improved or worsened.

Simple experiments can be performed with balsa wood airplanes to teach aviation's basic principals. Moisten the wing flaps and bend gently to test the effect on flight. The same thing can be done to the rudder and aileron to test the effects these structures have on the nature of the flight.

A rubber powered airplane is a great companion to keep kids, young and old, occupied on trips to the park, the beach, sporting events and other outdoor activities. They are wonderful backyard toys also!

For education or just plane fun, the rubber band powered balsa wood plane is hard to beat. Simple to construct and easy to fly the Sky Streak is sure to please teachers, students, parents and kids. And they will bring a smile to Granddad’s face as he remembers the fun he had flying one of these toy airplanes with his granddad!

The simple toy airplanes are fun to fly, but at some point you may want more challenging fare. Balsa model airplanes can be the next step to a fun and fascinating hobby. These model kits require more time to assemble. Most are rubber band powered, some of the larger ones can be adapted to a small motor for free flight. A few can also be fitted with radio control equipment and flown.

In short, rubber band powered airplanes are fun to build and fly! Back To Balsa Wood Airplanes © 2012 Hobby Hobnob

Thursday, April 20, 2006

Building Balsa Wood Airplanes


Building and flying balsa wood airplane models is an excellent way to learn about model airplane building and the basics of flying model planes. This is the method of plane building by aviation’s pioneers, and the skill is still basic that hobbyists use to build model planes. The construction techniques for wood model kits are simple, but patience is required to cut, fit, and glue the pieces into place.

The best method to learn to build these plane is to use the Build and Fly Balsa Wood Kits model series from Guillow. This is a four plane series which starts with a simple all balsa glider and proceeds to an all tissue covered rubber band powered airplane. The planes use a build by number system, and teach plane building in easy to learn steps.

The first plane in the series - the Goldwing Trainer Wood Model Kit - assembles in about two hours and is suitable for ages 8 and up. The kit includes glue and detailed instructions. The wingspan of the completed airplane is about eleven inches and will fly about 100 feet. It is an all balsa glider.

The Cadet Airplane Building Kit is the second plane in the series, and is a rubber band powered plane. The kit also includes glue and requires about four hours to build. Also suitable for ages 8 and up, the Cadet has a fourteen inch wingspan
and will have flight up to 150 feet. The body is balsa, the wing is a simple tissue covered structure.

The Cloudbuster Balsa Wood Airplane is the third balsa wood airplane in the series, and teaches more complex wing construction. The wing is an airfoil, and features a dihedral angle to give the plane a more stable flight. This wood model kit is suitable for ages 8 and up, and requires about six hours to construct. Rubber band powered flight provides flights up to 175 feet. The glue is included in the kit.

The last plane in the series is the Flyboy, a twenty one inch wingspan plane. The skills obtained building the first three planes are used to build this plane. It will take about eight hours to build, and will provide the longest and best flights of the four models. It is also a rubber powered airplane.

Building stick built planes requires a minimum of tool. These include:

Building board - foam core, fiber board, ceiling tile

Wax paper

Modeling pins

Hobby knife

Pencil

Glue - white or C/A

Fine grit sandpaper

Ruler

The plan is pinned to the building board. Diagrams in the plan are used to
measure the part, which are then cut with a hobby knife. Cover the plan
with wax paper, and build the plane in sections right on the plan. The
parts are held in place with hobby pins until the glue dries, allowing
you to remove the section.

After all the sections of the plane are built, the sections are glued
together, forming the plane. The framework is coated with glue, and
tissue is stretched and cut over the balsa frame. When the glue is dry,
the tissue is sprayed lightly with water. It tightens as it dries,
forming a nice, firm skin for the airplane. The plane, after some final
construction details, is now ready to fly.

Learning to build and fly these kits will help the modeler learn skills
needed to build and fly the larger, more complex radio control airplane
kits. Or free flight airplane can form the basis of a lifelong hobby as
there are literally hundreds of these kits available to build and fly.
Have fun!

For a pictorial demonstration of building a model balsa airplane visit this

link.

Wednesday, April 19, 2006

Scenery Materials at Toy Train Central

SCENERY MAKING MATERIALS FOR DIORAMA AND MODEL TRAIN BUILDING

Specialized materials for scenery making have been developed which are basic to all scenery making - model railroads, school projects, or museum display. The materials discussed in this column will be primarily Woodland Scenics line of materials because of their high quality and widespread availability.
Styrofoam products consist mainly of sheets, risers, and incline sets. Sheets may be used for diorama or layout bases, building tunnels, and mountains. Risers are flexible Styrofoam strips used primarily for track bases in model railroads, but could have other uses in the diorama. Incline sets are also used primarily for railroad layouts, making it easy to change elevations in track plans.
Newspaper or tissue paper also has uses in scenery making. It is used to build up mountains and fill in slopes. Wad the paper up to build hills; roll it to form banks or long hills.

Duct or masking tape is used to hold the paper hills together until the plaster cloth is applied. Tape may also be applied to fill in some gaps and connect hills.
Plaster cloth is used as the main surface of the scenery model. It is cheese cloth which has been impregnated with plaster and is sold in rolls. It is stretched over the completed sub-terrain and sprayed with water. It hardens into a hard shell surface, perfect for scenery making.

Hydrocal is a lightweight plaster used for terrain building. It is used to pour rocks, bridge supports, and fill gaps in the surface.
Mold-A-Scene is a powdered material which is mixed with water to form a putty-like material useful for gap filling, forming behind rock faces and many other uses in the scene. It can be cut and carved when dry, making it a very useful material.
Smooth-It is a specially made hydrocal material, finer textured, which is used to make asphalt or concrete roads. Use Topcoat or Concrete Paving paints to finish the road. These products used together do a very good job of mimicking roads.
Earth Colors are pigments used to color the terrain before applying ground foam. There are various earth tints and rock colors in the set.

Ground foam is a colored, finely ground material useful for modeling grass, weeds, and other vegetation in the scene. It is available in various colors of green, and a variety of textures. It is used with Scenic Cement. The foam is sprinkled over the surface of the scene and sprayed liberally with the cement. Scenic Cement is very dilute liquid glue which has been formulated to flow through a spray mister.
Lichen Moss is used to make trees, form unkempt, shrubby areas in the scene. It is packaged in plastic bags and is available in several colors. It is glued to the terrain with tacky glue.

Ballast is used on model railroad layouts to simulate the ballast on railroad tracks. It may be used in a diorama to simulate a gravel road or rocky area. It comes in a variety of different textures and colors.

Rock molds are used with hydrocal to cast rocks for model railroad scenes or scenery projects. The mold is first misted with water, hydrocal mixed according to the directions on the package and poured into the mold. The plaster is allowed to dry and then popped out of the mold. The rocks can then be painted as desired to simulate whatever rock is to be modeled.

Trees may be purchased ready made, or made up using a tree making kit. Ready made trees from Woodland Scenics or Lifelike are the easiest, but for large numbers of trees, a tree making kit may prove more economical.

These are the basic scenery materials. Model train layouts and dioramas will be quite realistic using the various scenery materials described. Visit our Train and Scenery section at the web site at the top of this article for the materials discussed.

Thursday, April 13, 2006

Balsa Wood Model Airplanes At Flying Fun Stuff


Balsa Wood Model Airplanes


Building and flying balsa wood airplanes is a fun hobby which can entertain the entire family. Rubber band powered airplanes and hand launch gliders are classic toys which are still as much fun in this high tech age as they were in the days when our grandparents built and flew them.


The easiest to build are the small balsa gliders and airplanes which just slide together. There are both rubber band powered airplanes and gliders available in this type of model airplane. Requiring just minutes to assemble, these little toy airplanes fly pretty good and some will even do a limited number of stunts.


Then there are the “stick built” balsa wood model airplane kits. These are a bit more complicated to build, but they are fun projects to build and even more fun to fly when completed. These kits also make handsome display models to exhibit in your home.
These model airplane kits require very few tools to build. Usually a hobby knife, building board, ruler, pencil, glue, modeling or dressmakers pins, sandpaper and scissors are all that is needed to assemble a balsa wood plane kit.


Most of these airplane kits are rubber band powered, though some of the larger ones can be converted to free flight or even radio controlled flight. Some of the kits are quite large, the B-17 kit having a wingspan of over forty-five inches. Some builders of these balsa models never fly the airplanes, they leave the tissue covering off them, sand and seal the wood framework with a good varnish or polyurethane, and hang them up for all to admire.


There is a balsa wood airplane for just about everyone! The small, easy to assemble and fun to fly rubber band powered planes and hand launched gliders are great for kids. Modelers looking for a bit more of a challenge will find the model airplane kits fun to build. Flying the airplanes adds a bonus feature to the building experience.

Wednesday, April 12, 2006

Wood Crafts at Our Online Store

Wood Project Kits For Cub Scouts and Youth Groups


Wood crafts are an ideal activity for youth groups. These wood craft kits are easy to assemble and include all parts necessary to build the projects. All you need are paints and glue.


Youth group leaders of Church groups, Cub scout troops, and other youth groups are always looking for inexpensive items for kids craft activities, and these wood crafts are ideal for this purpose. Wood crafts teach kids valuable lessons in organizing, reading and understanding instructions, and the satisfaction one gets from a job well done. And these wood crafts are useful when finished.


Wood projects also make ideal activities for summer camps. They are quick to assemble as all parts are pre cut. All that is needed is glue or nails and paint. Some of the kits have the nails included in them.


Some of the more popular wood project kits are the bird house and bird feeder kits. The kids can have a fun learning experience building the project and the completed kit can be the basis for a backyard nature center.


In addition to the wood bird feeders and bird house kits other neat projects are available. Wood boxes to paint, towel racks, sconces, roll note holders and many other types of kits are available. These project kits, like the bird feeders, have all the necessary precut parts included and are fun to assemble.


Wood ship kits can be fun to build and race when completed. Youth group leaders will find a nice assortment of sailing ships of different types to build. There is even an exciting wood catamaran project kit to build and sail. The ferry boat kit is available as both a boat and as a crayon holder.


In short, summer camp attendees, cub scout troops and many other kinds of youth groups will find these neat little wood project kits fun to assemble and easy to decorate when the building is complete.